Numbers and Flags
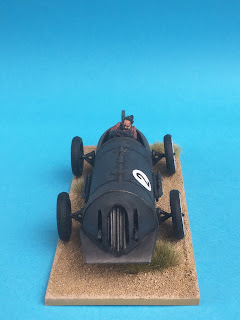
I finally got around to photographing my finished cars.
I knew from the outset that I wanted them to have numbers on, I just wasn't sure how to go about it.
Then I remembered I had some white decal paper that I had bought years ago for another project.
A quick trip to the local craft store and I soon had a suitable sized hole punch to create the backgrounds for my vehicle numbers. Once applied I then added WW2 German Tank numbers which I over-painted to help them blend in better with the pulp style cars.
After that it was a waiting game for the bases I had ordered. The earlier style cars have much flimsier axles then the later Eureka Miniatures releases, so bases where almost a necessity. I actually like them being on bases for a few reasons.
It stops them looking like toy cars and more like gaming pieces.
It adds a nice set of standard sizes to them.
It provides a firm line to position the movement template.
It gives much needed support and adds to the rigidity of the cars.
It prevents the vehicle from getting damaged whilst in there transport box.
Anyway, on to the pictures.
#1
#2
Baron Munchausen in the Mean Machine.
#3
#4
#5
Fiona Fuelstop in the Love Bug.
#6
Professor Spat Ending in the Sour Grape.
#7
Neddy in his Red and Yellow Car.
#8
Duke and Mumma in the Bush Banger.
#9
Rosie and Jim in the Blue Marloo.
#10
Of course there had to be a
#57
Peter Perfect in the Turbo Terrific.
#00
Bruce Bastardly with his trusty Blue Heeler, Smiffy in the Purple Fury.
Each car is given a name for both its driver and the vehicle when it first gets played. As you can see there are still plenty of competitors still to join the race!
Next up I thought it would be nice to add some simple terrain.
A start line seemed like an obvious place to start. Just a thin strip of 3mm MDF with flags made from copper rod and copper sheet. I painted them green to tie in with race start flags. There is a gap of 12" between the two flags which I think should provide ample room.
Next up was the four areas to manoeuvre around and dictate the course. My original plan was to number the flags or do them in different colours. Then I had a complete change of direction and instead used oil drums to indicate which order they are to be navigated in. The first checkpoint having one oil drum and each checkpoint after that having more.
I painted the flags yellow as that is the colour used on race tracks to indicate a hazard.
The bases were made from simple cheap wooden coasters available in the craft section of the local hardware store.
Checkpoint #1
Checkpoint #2
Checkpoint #3
Checkpoint #4
Finally a finishing line. Made in exactly the same way as the starting line only with chequered flags.
Thanks for looking and happy racing.


They look brilliant! Wonderfully characterful
ReplyDeleteI agree, big identification numbers are a must have
Well done and thanks for sharing!
PS my package of Maximillian cars from Eureka just arrived :-)
Thanks Paul.
DeleteHave fun with your cars and I look forward to seeing your work posted on The Lead Adventure Forum soon.